Basic Drupal and SugarCRM Integration pt. 1
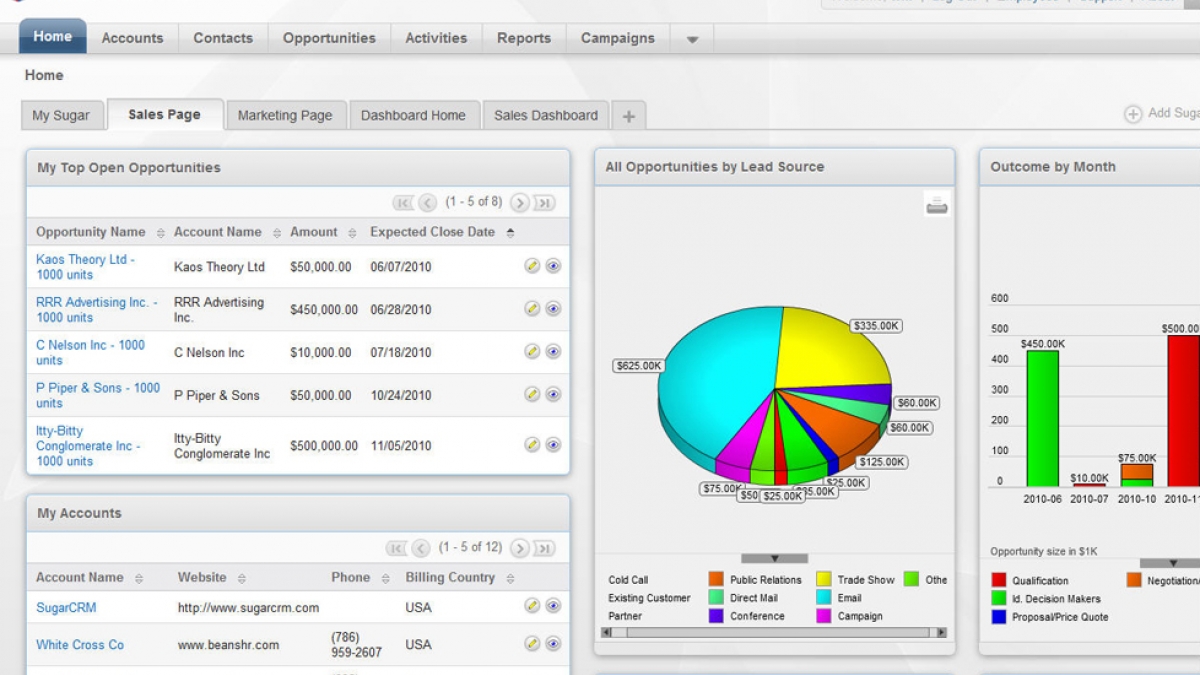
If you are using your Drupal website to generate leads for your business, then implementing a simple Customer Relationship Management (CRM) system is an important step to efficiently track and organize those leads. Since we love Open Source here at LevelTen, let's see how we might implement a system to automagically transfer a lead from your "Contact Us" form on your website, to the powerful and open source CRM system, SugarCRM.
The following procedure works in Drupal 6 or 7, although some details might be different between versions. I am using Drupal 6 and Webform 3 for this example.
First, we need ... SugarCRM, and more specifically, the totally free Community Edition, version 6.x. Download and install on any available server or local LAMP (or Microsoft) stack you have available- it doesn't have to be on the same server as your Drupal site (although that might be easier). If you prefer, you can pay for a hosted version by the commercial arm of SugarCRM. Instructions here, and make sure you follow the part about setting file and directory permissions, or you will get an unusable installation.
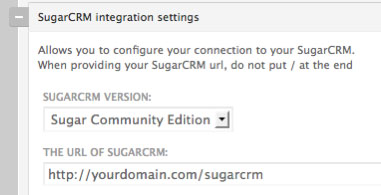
 Next we'll need the Webform2Sugar Drupal module. Download and install in the usual manner (don't you hate when people say that?). After you've enabled the module, you'll need to link it to your SugarCRM installation- navigate here on your Drupal site- admin/settings/webform and you'll see "SugarCRM integration settings". Choose your edition of SugarCRM (Community) and the URL of your SugarCRM installation. Save configuration.
The next steps are to create a Drupal webform, create a SugarCRM campaign specifically for this webform, and link them together. Let's create the campaign first - in your SugarCRM installation, click on the subtab Campaigns then click Create Campaign (classic).
 Choose a name, set the Status to Active, the Type to Web, and set a campaign end date (I use the the end of each year, then start over on Jan 1). After you save it, copy the long string of letters, numbers and dashes in the web address after "record=" - it will look something like "cdd50345-0114-3c46-de21-4e4ab4ad475".
To create the webform, we go to /node/add/webform and enter the basic information - give it a title and put text explaining the purpose of the webform into the body. Save this part, which will then bring up a new page to add "components" (fields) to the webform, as well as link this webform to a specific SugarCRM campaign.
Click on "SugarCRM settings" and paste that long string we copied earlier into "Campaign ID", then save. Now any submissions to go that webform will link to that specific SugarCRM campaign!
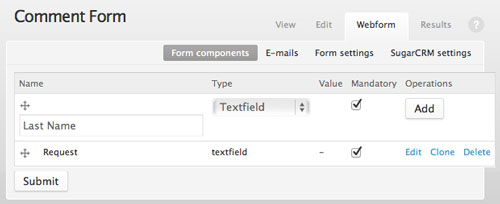
 Almost there - we just need to add two fields to the webform for Last Name and Request. Add a text field called "Request" and click Add. A new screen will appear where you can add a default value, help text that appears under the field, and other details. Just ignore those for now and click on Submit. Do the same for Last Name- this is the one required field for SugarCRM.
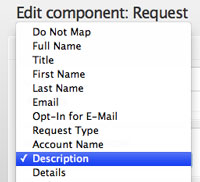
 Just one more thing- we need to link our webform fields to fields in SugarCRM. Go back to Form Components on your webform and edit the Request field. You should see a new drop-down called Map Field to SugarCRM, as shown to the left..
These are all the default SugarCRM fields, and since there is no Request field in SugarCRM, we'll need to map it to something else- we'll use Description for now. In Part 2 we'll learn how to create custom fields in Sugar and map them to your webform. Submit, then do the same for Last Name, mapping it to Last Name (this one already exists in Sugar, and is required).
Publish your webform and link it from your site, and that's it! If everything was done correctly (and I didn't forget any steps), any submission to your new webform should show up as a Lead in Sugar.
In Part 2 we'll discuss some additional customizations, including creating custom fields, outgoing triggered emails, and linking your own email account to SugarCRM to track email communication with clients and prospects.

