Setting up HTTPS with Pantheon using CloudFlare
If you are getting ready to launch a new website that you have built on Pantheon's Drupal platform, you may find yourself (as I recently did), a little befuddled by all of the possible options and recommendations provided by Pantheon. Pantheon recommends that you use HTTPS, instead of plain old HTTP, for your website, meaning people who visit your new website will get the friendly safety symbol in your browser's address bar when visiting your website.
In this blog post I will walk you through why you want HTTPS, how to get it (for free!), and how to connect your 'live' Pantheon website at http://live-[your-website].pantheonsite.io/ to your domain http://www.[your-website].com.
Why HTTPS?
I'm going to rely on Wikipedia here, because it puts it better than I ever could:
HTTPS is a protocol for secure communication over a computer network which is widely used on the Internet. HTTPS consists of communication over Hypertext Transfer Protocol (HTTP) within a connection encrypted by Transport Layer Security or its predecessor, Secure Sockets Layer. The main motivation for HTTPS is authentication of the visited website and protection of the privacy and integrity of the exchanged data. (read more)
So, yeah, security. And also Google says so.
why CloudFlare?
CloudFlare (according to themselves) runs a huge DNS network, so even using their free DNS services they will give you fast look-up speeds, built in security from DDoS attacks, and other goodies. In case you need a refresher (I always do when I start thinking about these things too much), the Domain Name System (DNS) operates like a omniscient operator who that tells your computer's browser where to get the location - the website's IP address - for any given a website. So when you enter http://eelslap.com/ into your browser's address field, DNS will tell you to go to 64.13.192.146. You can also get this information via the command line by running nslookup eelslap.com . If you want to get into the down and dirty details, Verisign has a pretty cool animation and explanation of DNS.
With CloudFlare's Free plan you get SSL, which means you will get HTTPS, without having to go to a Certificate Authority to get a certificate that you then need to install on your server and keep up-to-date. Getting the certificate yourself from a Certificate Authority is a super fiddley process that is easy to get wrong, so CloudFlare does it for you and makes it easy.
Going live with HTTPS on Pantheon
Pantheon has extensive documentation, but it can be a bit of an embarrassment of riches, in that there is so much of it, with so many possible options, it can be hard to know if you are following a good path. So I hope I have simplified things down a little bit for those of you that have a simpler Drupal website without crazy traffic or other unique needs. The only thing you'll need now (besides your Pantheon account login information) is the login information for whoever you used for to register your domain (ie GoDaddy, Network Solutions etc).
1. Make sure your site is ready to go live
Pantheon has an exhaustive checklist of items to do when you are ready to launch your website. You don't have to do all of the things they suggest, so tailor your configuration to the needs of your website. At a minimum, you will need to:
- Deploy your site to the live environment
- Select a plan and pay for it
- Set up automated backups once you have upgraded from a sandbox plan (ok, you don't have to do this, but why wouldn't you?)
- Review the 'status' of your website in your dashboard (again, not mandatory but a good idea and won't take too long)
2. Set up your CloudFlare account
Your website is ready to launch now, so next we need to add HTTPS for free with CloudFlare. Pantheon has a doc for this, but I had to do a little additional fiddling to get it right.
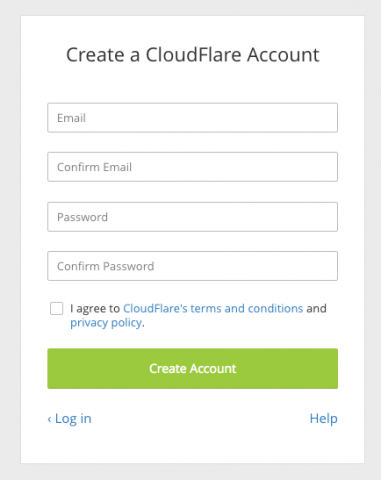
First sign up for a CloudFlare account.
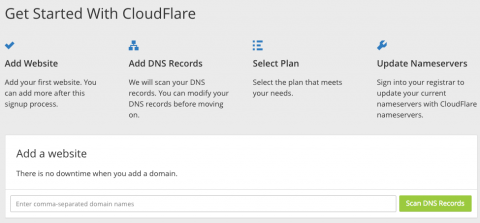
Next you'll enter in the domain of the website you want to set up HTTPS for.
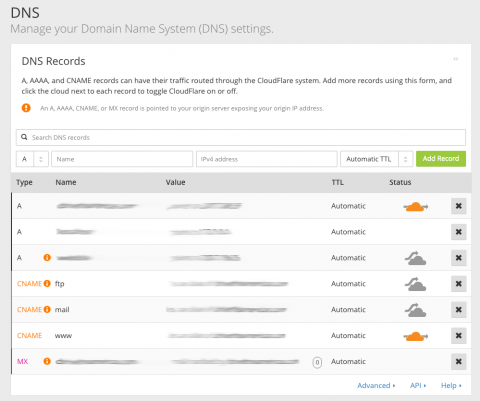
You'll get to watch a cute video about how CloudFlare works while they look up your DNS records. You'll then be sent to the DNS page of your CloudFlare account. It will have found many (if not all) of the DNS records for your website.
If it's missing any DNS records, you should add them at this point. Log in to your domain registration account, and navigate your way to your DNS records to confirm CloudFlare didn't miss anything. This can be a little fiddley as the fields for the A, CNAME, or MX records might not exactly match up with what you see for the various records on your domain registrar. You'll have to do a little exploring here for yourself but after some trial and error you can get the DNS records on CloudFlare to match the DNS records displayed when you log in to your domain registrar. Don't worry - you won't blow up your website or email (yet) by exploring a bit here, since you haven't changed anything with your domain registrar. It won't know anything about CloudFlare until we do a couple more things. Also, we will come back here to tell CloudFlare about your Pantheon-hosted website in a bit. We just have some other things to do first.
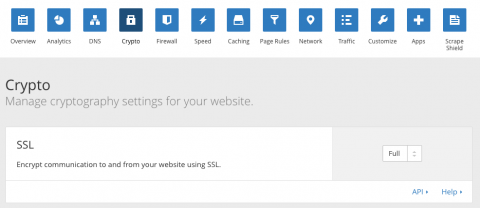
Next per Pantheon's docs, go to the Crypto page to enable SSL - I think their docs are a bit outdated as things seemed to have changed on the CloudFlare side. As opposed to the Pantheon docs, I found that SSL was already set to Full, and that there is no little 'Active Certificate' box. So just make sure you have SSL set to Full.
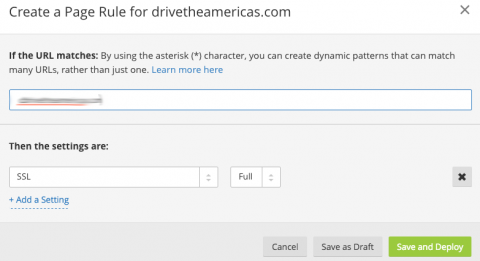
Last for CloudFlare you will need to standardize all traffic on HTTPS. Again, it was slightly different what I observed from what Pantheon had in its docs. In CloudFlare, go to the Page Rules page, and click on the Create Page Rule button. Instead of being able to directly select 'Always use HTTPS' per Pantheon's screenshots, I found this option isn't immediately available in the dropdown. Instead, select SSL, Full.
Then magically the next day when I was checking on CloudFlare, it had changed to the Always Use HTTPs option - maybe it takes some time to provision or something.
3. Edit your Settings.php
With CloudFlare set up, you will need to edit your settings.php. Pantheon suggests that you set up your dev and test environments with CloudFlare as well, but for simplicity's sake I didn't bother. Again, my experience here differed slightly from Pantheon's docs, but it's likely that there are many ways to do this correctly. For the example below, I've named our demo website sadpanda - you'll want to replace all of the 'sadpanda' with your website's domains (thanks to Kyle for help with the settings.php mods, among many, many other things).
<?php
# CloudFlare specific setting
if (isset($_SERVER['HTTP_CF_CONNECTING_IP'])) {
  $_SERVER['REMOTE_ADDR'] = $_SERVER['HTTP_CF_CONNECTING_IP'];
}

@include_once('local.settings.php');

// SSL
$scheme = (!isset($_SERVER['HTTP_X_SSL']) || (isset($_SERVER['HTTP_X_SSL']) && $_SERVER['HTTP_X_SSL'] != 'ON')) ? 'https' : 'http';
// Set local_env to true if not on Pantheon
$host_is_local = empty($_SERVER['PANTHEON_ENVIRONMENT']);
$host_env = 'live';
if (!empty($_SERVER['PANTHEON_ENVIRONMENT'])) {
  $host_env = $_SERVER['PANTHEON_ENVIRONMENT'];
}

// All Pantheon Environments.
if (defined('PANTHEON_ENVIRONMENT')) {
  // Redirect to non-www & dev/test sites.
  if (php_sapi_name() != "cli") {
    switch ($_SERVER['PANTHEON_ENVIRONMENT']) {
      case 'live':
        $base_url = $scheme . '://www.sadpanda.com';
        break;
      case 'test':
        $base_url = $scheme . '://test-sadpanda.pantheonsite.io';
        break;
      case 'dev':
        $base_url = $scheme . '://dev-sadpanda.pantheonsite.io';
        break;
    }
  }
}
You'll need to deploy these changes to settings.php through dev, test and live, and confirm on each of your environments that you haven't screwed something up along the way.
4. Change your nameservers
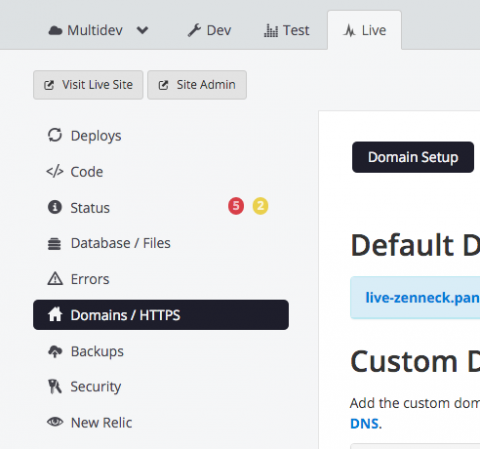
So, you've got your Pantheon live environment all ready to go, you've upgraded your Pantheon account to something like Pro by giving them your billing information, and you've got CloudFlare almost ready to implement HTTPS, so lets now get the Domains and DNS information from Pantheon. Essentially, we've already done Step 1: Determine the URL to Serve From on Pantheon's docs, using the HTTPS protocol via CloudFlare's free Universal SSL service. Let's move on to Step 2: Add Domains to the Site Environment. I found their docs here a little terse, so here are more details. Under the Live environment, click on the Domains/HTTPS menu item
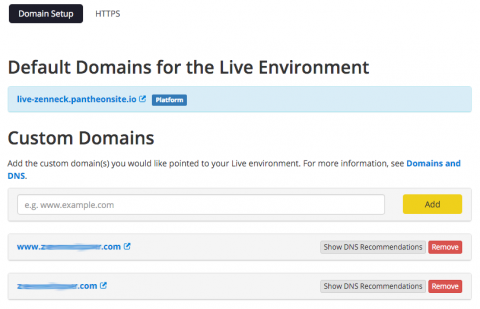
Add both the www .sadpanda.com and sadpanda.com domains (of course, change your domains here).
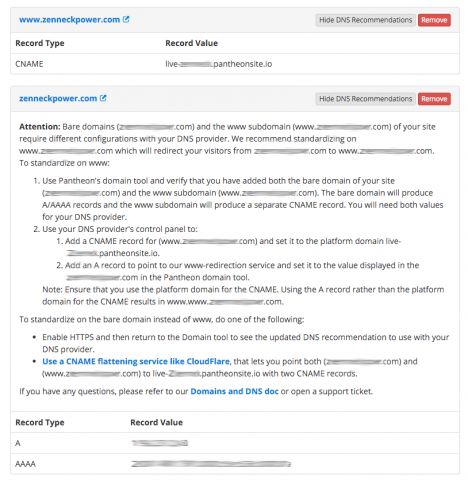
I'm going to provide more details than what Pantheon gives on their Step 3: Configure your DNS instructions as well. If you click on the Show DNS Recommendations, for the www. sadpanda.com domain, you will see something simple with just a CNAME record type, and something more complicated for the bare domain, sadpanda.com
You'll need the CNAME, A, and AAAA record information to finish the setup with CloudFlare next.
5. Finish DNS Setup on CloudFlare
Under the DNS heading of your CloudFlare account, you will want to add the CNAME record for your www. sadpanda.com domain, and the A and AAAA record information for your bare sadpanda.com domain.
Also add the dev and test domain information here for your Pantheon environments.
6. Change your nameservers
CloudFlare will assign you 2 nameservers to use for your website.
Now you need to take this information, log in to your domain registrar, and update your nameservers. How you this do depends on your registrar, but look for something like Domain Records and Nameservers and make the update. While your registrar will probably say something like this will take 24-48 hours to propagate, I saw an almost immediate change thanks to CloudFlare.
7. Check your new website
Go to your website at http://[whatever].com and make sure it redirects you to https://[whatever].com. Hopefully all is well at this point! There is a bit of an unknown in this how-to in that each domain registrar has its own way of handling name servers, so it may take some fiddling. Best of luck!
