How to set up Drupal Commerce Message to send emails to the store admin and customer (that include the cart contents)
Setting up automated emails from your Drupal Commerce store can end up being a little trickier than any of us might like. In this tutorial, I will walk you through how to do the following:
- Set up automated emails after an order has been placed (thanks to the Commerce Message module)
- Customize the automated email that is sent to the customer to include the items they purchased (the contents of their cart)
- Set up an automated email to go to the store administrator when someone has checked out
- Debug all of this thanks to the Devel and Maillog modules so you don't have to have email or payment set up
First off, a big thanks to Nick Vahalik (aka nvahalik on drupal.org) for some very useful suggestions on setting up Commerce Message, and the whole idea of using use Devel and Maillog to troubleshoot this issue.
Download and enable the following modules:
- Maillog - we will use this to speed up development so we don't have to worry about sending/receiving emails or placing orders to test our work
- Devel - again, used to help us understand what is going on, not actually required in terms of getting this running
- Token - provides additional tokens not supported by core (most notably fields), as well as a UI for browsing tokens
- Commerce Message - includes order-specific message types ("order payed", "product added to cart", "admin comment", "user comment", "order confirmation") that are sent via Rules. If you use drush,
drush dl commerce_messageanddrush en commerce_messagewill download and install this module and all of its dependencies (listed below). - Message - enables logging and displaying system events in a number of different use cases
- Message Notify - provides a method for sending a message via a notifier plugin. Message Notify comes with plugins for email and SMS and may be extended to other transport mechanisms as required.
- EntityReference - provides a field type that can reference arbitrary entities
1. Enable Commerce Message and see what's going on with this module
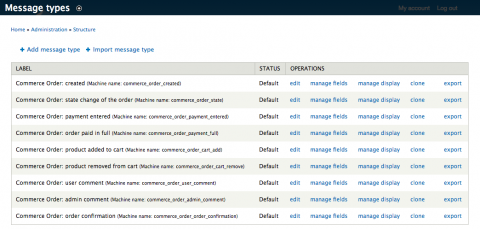
For the purposes of this tutorial I will be using a vanilla Drupal Commerce site created by Commerce Kickstart (1.x-1.42). After enabling Commerce Message if you navigate to Structure -> Message Types you will see the messages that come out-of-the-box thanks to Commerce Message.
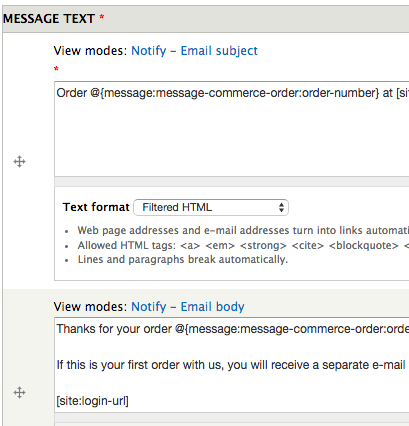
For this example we are going to look at the last message, Commerce Order: order confirmation. Edit this message to get an idea of what is going on here. You will see there is a Message Text area, where you can modify the subject and body of a notification.
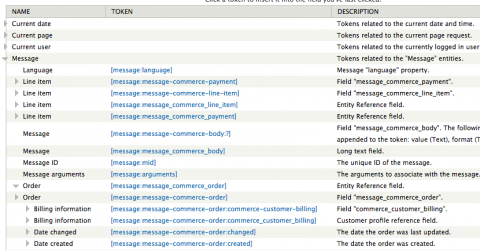
There is also the option to insert tokens into these fields. Open up the tokens for Message->Order and you will see a veritable plethora of tokens.
How are these messages sent? Head over to Rules (Configuration->Workflow->Rules) to check it out. Let's check out the Rule that comes pre-configured as part of Commerce Message with the Message Type we were just looking at - this is Commerce order message: order notification e-mail. Edit the rule. I'm not going to go through the details of how this works, but the basics are that when a checkout is completed, Commerce Message creates a new message type, the Commerce Order:order confirmation, which is then sent via Message notify (the last action). In this last action you can set who the message is sent to, but if you're going to use the Maillog module like I am, you don't need to worry about setting up the recipient's email address.
2. Troubleshoot using Devel and Maillog so you don't have to have emails or payments set up
To make customization of this message easier to troubleshoot, this is where we will use the Devel along with Maillog modules. It is a total drag to have to add a product to the cart, checkout, and check your email to see if the changes you have made are doing what you want. You'd also have to get mail set up as well as some kind of sandbox payment system. Let's not worry about all of that for now, and use Devel and Maillog instead to make our lives easier.
Under Structure->Blocks enable the Execute PHP block provided by Devel and put it somewhere visible (I just stuck it in the Content block region). Also make sure Maillog is set up to display emails on the page by going to Configuration->Development->Maillog Settings.
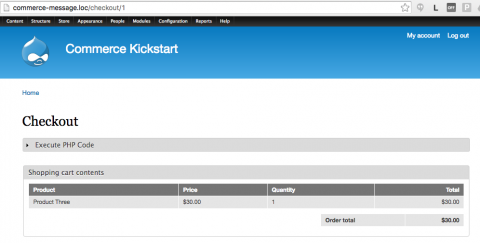
Now lets first make sure Maillog and Devel are going to show us the information we need to get to work. Add a product to your cart, view your cart, and then click checkout. This will give you your order number - it's in the path after /checkout/[order-number]. In my case, it's simply '1' since this is the first time I've added anything to the cart on this commerce kickstart site.
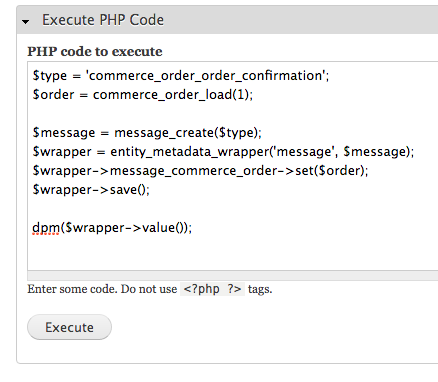
Here is another thanks to Nick - check out his Gist at https://gist.github.com/nvahalik/1862eefa43ff3a6f3d22. First we will grab the message_id using the following code - for your case, you'll want to replace the 1 in commerce_order_load() with whatever your order number is.
$type = 'commerce_order_order_confirmation';
$order = commerce_order_load(1);

$message = message_create($type);
$wrapper = entity_metadata_wrapper('message', $message);
$wrapper->message_commerce_order->set($order);
$wrapper->save();

dpm($wrapper->value());
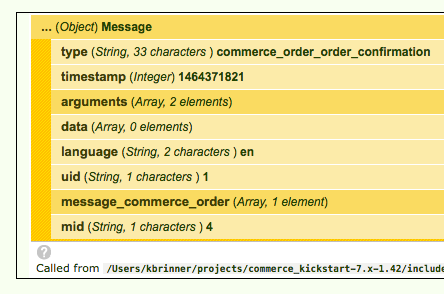
Paste this into your Execute PHP Code block and hit execute. Devel should dpm out the Message object which contains the desired mid (message id).
Now take that mid (in my case, 4), and paste it into the Execute PHP Code with the second part of Nick's gist and hit the execute button.
$message = message_load(4);
message_notify_send_message($message);
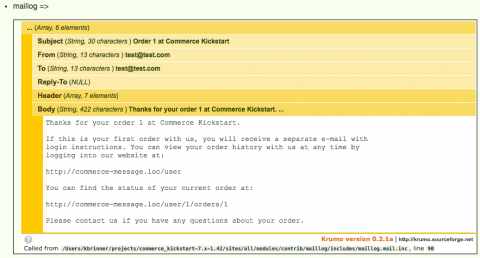
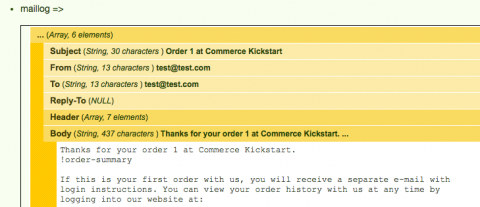
Devel will now dpm the email thanks to Maillog that would have been sent if you had gone through the checkout process and had everything set up (payment sandbox, mail etc). Hooray for not having to worry about all of that while we're developing locally.
3. Add cart contents to customer email using !order-summary
First off, most people would want the contents of the cart included in the email sent to the customer. Luckily this is provided to us by Commerce Message thanks to the order-summary argument. Check out the function commerce_message_message_presave() in commerce_message.module, line 59. To add an order summary to our email, edit the Order Confirmation message provided by the Commerce Message module at admin/structure/messages/manage/commerce_order_order_confirmation and add !order-summary where appropriate - here's where I put it:
Now go back and hit execute again in your Execute PHP block to see what the email says now. 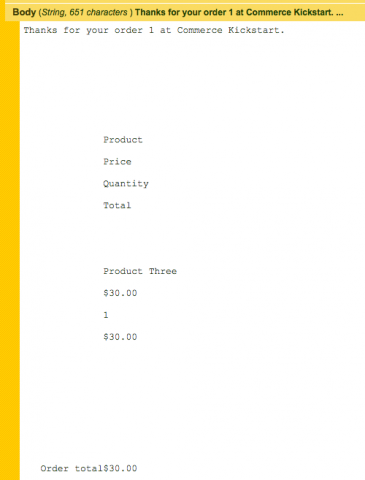
Ugly, yes. But that is for another blog post. At least for now we have the information in the email.
4. Send emails to store administrator
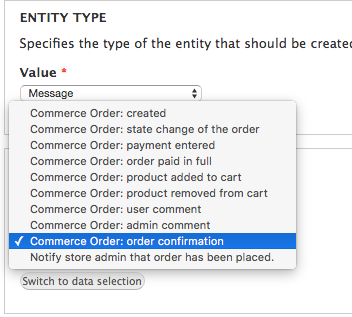
Now you also probably want to send a simliar email to your store's admin letting them know that someone has placed an order. Head back to the Commerce Message types at admin/structure/messages and clone the Commerce Order: order confirmation message. Let's name it commerce_order_admin_notification, and give it a nice description, something like Notify store admin that order has been placed. Save the message type. You should now have your 2 message types:
If you also want this email to get sent out for real at some future date, you'll also want to clone the Commerce order message: order notification e-mail rule at admin/config/workflow/rules, and for the first action of your cloned rule (create a new entity), select your new message type (in this example, Notify store admin that order has been placed).
But we don't need to worry about that now since we are using Maillog to view the emails. Let's re-run our PHP code to grab the message ID, but this time be sure to change the $type to our new message type, commerce_order_admin_notification.
$type = 'commerce_order_admin_notification';
$order = commerce_order_load(1);

$message = message_create($type);
$wrapper = entity_metadata_wrapper('message', $message);
$wrapper->message_commerce_order->set($order);
$wrapper->save();

dpm($wrapper->value());
Now we see our mid is 5, so we can take that new mid and print out the message with the following:
$message = message_load(5);
message_notify_send_message($message);
Let's look at what is printed out now by devel and Maillog:
5. Get the !order-summary argument working for cloned Commerce Messages
Aw, snap. Why isn't !order-summary being printed out? I googled my way to this forum post which explains it - !order-summary while cloning a commerce message. !order-summary isn't a token, it's injected by the Commerce Message module in the following function:
function commerce_message_message_presave($message) {
  if (!empty($message->mid) || $message->type != 'commerce_order_order_confirmation') {
    return;
  }

  $message->arguments['!order-summary'] = array(
    'callback' => 'commerce_message_order_summary',
    'pass message' => TRUE,
  );
}
We see here that the message type is commerce_order_order_confirmation. Since we cloned this message type and gave it a new name (commerce_order_admin_notification) this hook_message_presave isn't being invoked. Let's fix that with a quick custom module of our own. For this example I'll call my custom module dc_message_demo - make the necessary .info and .module files and enable your module. Then add the following to your module - replace the $message->type with whatever you named your cloned message type. Now your custom message type will know about the !order-summary argument.
/**
 * Implements hook_message_presave().
 * add !order-summary to custom message type
 */
function dc_message_demo_message_presave($message){
  if($message->type == 'commerce_order_admin_notification')
  {
    $message->arguments['!order-summary'] = array(
      'callback' => 'commerce_message_order_summary',
      'pass message' => TRUE,
    );
  }
}
Let's make sure this is working. Clear cache and then we will need to get the new message ID. The message ID has changed now that we have implemented our hook_message_preave. Execute the PHP code via the devel block to get the mid.
$type = 'commerce_order_admin_notification';
$order = commerce_order_load(1);

$message = message_create($type);
$wrapper = entity_metadata_wrapper('message', $message);
$wrapper->message_commerce_order->set($order);
$wrapper->save();

dpm($wrapper->value());
Now we see our message id is 6. So run the last part of the code to load the message:
$message = message_load(6);
message_notify_send_message($message);
Huzzah! The !order-summary is now printed out via Maillog.
Where is this !order-summary coming from you are now asking? It's coming from a Shopping cart summary view at admin/structure/views/view/commerce_cart_summary/edit - if you want to add anything to this !order-summary argument, you can do so there.
Happy drupal-ing!
